


Git and Version Control in 2026: Essential Skills for Every Developer
By Irene Holden
Last Updated: January 18th 2026

Quick Summary
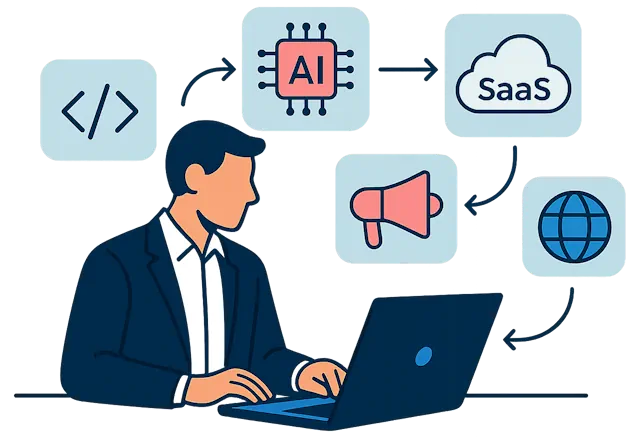
Yes - Git and version control are essential skills for every developer in 2026 because Git is the backbone of modern workflows and the way teams (and AI) coordinate changes. Git now accounts for about 93.87% of version control usage, GitHub Actions processed roughly 11.5 billion CI minutes last year, and AI agents have already authored over a million pull requests, so mastering atomic commits, branch-per-feature workflows, PR reviews, and basic CI/GitOps (which drives over 90% of Kubernetes deployments) is how you safely manage, review, and roll back both human and AI-made changes.
You know that feeling when you finally get a kitchen somewhat under control - pots simmering, cutting board mostly clear - and then someone hands you three more recipes and says, “Also, don’t burn anything”? That’s what modern software feels like without a good mental model for Git: too many moving parts, not enough structure, and no safe way to recover if something curdles at the wrong moment.
See your project like a kitchen, not a folder
Instead of thinking of Git as a pile of mysterious commands, picture three different ways of running a kitchen. They map almost exactly to how beginners, improvised “zip file” users, and professionals handle their code.
| Approach | Kitchen analogy | Typical result |
|---|---|---|
| No version control | One giant pot on the stove; if it burns, dinner’s done | Any bad change can trash the whole project; “undo” is guesswork |
| Manual backups (v1, final_final.zip) | Dozens of half-labeled containers in the fridge | Hard to know which version is safe; everything takes space and time |
| Git | Frequent, labeled “tastes” of the dish and a small test pan for experiments | Easy to branch, try risky ideas, and throw away only the failed batch |
That last row is where professionals live. Git isn’t a magic backup button; it’s the system that lets you keep the main pot (your main branch) safe while you try wild ideas in a test pan (a feature branch), then decide calmly what actually makes it into dinner.
What Git is actually doing behind the scenes
Once you drop the “it’s just backup” idea, Git’s core pieces start to make sense. It gives you:
- Commits: tiny snapshots of your project at specific points in time - your “taste and adjust” moments.
- Branches: parallel timelines where you can experiment without touching the main dish.
- Merges and rebases: ways to bring those timelines back together once you’re happy with the flavor.
- Remotes: shared kitchens on platforms like GitHub where teammates (and AI agents) can collaborate.
- History: a smudged recipe notebook of everything that happened, when, and why.
According to RhodeCode’s 2025 report on version control systems, Git now accounts for about 93.87% of version control usage. That dominance isn’t an accident; teams leaned into Git because it’s fast, distributed, and plays nicely with all the timers and automation that keep a modern “kitchen” on schedule.
Why this mental shift is non-negotiable now
Zoom out to the industry scale and the kitchen metaphor only gets louder. AI coding agents have already authored over a million pull requests in just a few months, and they’re all flowing through Git. GitHub Actions alone processed around 11.5 billion CI minutes in a single year, and Git-powered GitOps pipelines are now used to manage more than 90% of Kubernetes deployments, turning a Git repo into the source of truth for entire fleets of servers. As GitHub’s Octoverse analysis of developer growth puts it, a new developer joins GitHub every second, and all of them are stepping into this same kitchen.
“Whatever effort you are putting into seeking an alternative, instead put that effort towards becoming a Git expert... It will be well worth it for your career.” - Engineering leader quoted in a Hacker News discussion on replacing Git
AI can now write recipes, chop vegetables, and even suggest when to take something off the heat. But it’s you deciding the menu, choosing when to branch, when to merge, and when to roll back to a known-good snapshot before the sauce burned. Practically, the mindset shift you can apply today is this: on your next tiny project, don’t think “I’ll just save my files.” Think, “I’m going to keep my main pot clean, experiment in a test pan, and use commits as deliberate tastes along the way.” Once that clicks, the individual Git commands stop feeling like magic spells and start feeling like routine kitchen moves.
Steps Overview
- Switch your mental model: treat Git like a kitchen
- Gather prerequisites and tools
- Install and configure Git and GitHub
- Master the core workflow: edit, stage, commit, push
- Branch like a pro and choose a branching strategy
- Use pull requests and code reviews (even when solo)
- Resolve merge conflicts without panic
- Automate tests with GitHub Actions and learn GitOps
- Write a human- and AI-friendly commit history
- Practice realistic workflows and build portfolio projects
- Build a 2026-ready learning path: bootcamps and next steps
- Verify your skills: self-checklist and next moves
- Common Questions
When you’re ready to ship, follow the deploying full stack apps with CI/CD and Docker section to anchor your projects in the cloud.
Gather prerequisites and tools
Before you start typing commands into a terminal, it helps to do a quick “mise en place” for your dev setup. Just like laying out knives, pans, and ingredients before dinner service, you’ll move faster and panic less if your basic tools and accounts are ready before you touch Git. Industry surveys now list Git and GitHub as baseline skills for full stack roles, with one report noting that 99% of open-source projects use some form of version control and that 85% of developers say it has made collaboration easier - so the tools you choose here are going to follow you into real jobs.
Confirm your starting ingredients
These prerequisites aren’t gatekeeping; they’re just making sure you’re not trying to learn Git and “what is a terminal?” on the same stressful night. If you can do each of these at a basic level, you’re ready to follow the rest of this guide:
- Open a terminal (or PowerShell) and run simple commands like
cd,ls, ordir. - Use a code editor such as Visual Studio Code to create and edit files.
- Read and lightly modify a simple JavaScript, Python, or HTML file.
- Create a free account on a Git hosting service like GitHub, GitLab, or Bitbucket.
None of this has to feel “expert level.” The goal is just that the tools themselves aren’t scary, so your brain has room to focus on Git concepts instead of fighting with the basics.
Pick your core tool stack
Once the basics are in place, you can assemble a realistic starter stack: Git on the command line, a host like GitHub, and an editor that understands Git. A lot of beginners confuse Git (the tool on your machine) with GitHub (the shared kitchen in the cloud); resources like KnowledgeHut’s breakdown of Git vs GitHub are helpful if that line is still fuzzy. Here’s a simple comparison to keep the main pieces straight:
| Tool | Category | Why beginners like it | Notable detail |
|---|---|---|---|
| Git (CLI) | Version control engine | Fast, works offline, used almost everywhere | Core skill for full stack, data, and DevOps roles |
| GitHub | Remote hosting & collaboration | Pull requests, issues, Actions, and social coding features | Central hub where teams and AI agents share code |
| Visual Studio Code | Code editor | Built-in Git panel, extensions, and great TypeScript/JS support | Default choice in many modern bootcamps and tutorials |
| GitKraken | Visual Git client | Makes branches and history visible as a graph | Highlight in GitKraken’s guides on Git branch strategies |
Start with the Git command line even if you like visual tools; employers still expect you to be comfortable in a terminal, and most advanced tutorials and Stack Overflow answers assume you can read and run raw Git commands.
Add AI and helpers when you’re ready
On top of that core stack, you can layer optional helpers: AI coding assistants like GitHub Copilot or Codeium that suggest code in your editor, and GUIs like GitKraken or Sourcetree that show branches as diagrams. Reports tracking AI adoption note that agentic tools are now expected to integrate tightly with Git so they can open branches, commit code, and raise pull requests on your behalf - but they don’t remove your responsibility for understanding the workflow. Think of these tools as extra line cooks; they can chop and stir, but you still own the recipe and the timing.
Practically, your move today is simple: verify you can open a terminal, install Git, and use a modern editor like VS Code; then create accounts on a Git host and, if you like visuals, install a Git GUI. With that mise en place done, every Git example in the rest of this guide becomes something you can actually try on a tiny project instead of just reading about in the abstract.
Install and configure Git and GitHub
Getting Git onto your machine is like turning the lights on in a new kitchen. Until it’s installed, everything else in this guide is just theory. Because version control has shifted from “nice-to-have” to essential safety gear in a market projected to reach around $761 million in value, developers are strongly encouraged to set up Git early and learn it properly rather than bolting it on later when a project is already on fire.
Install Git on your machine
The easiest way to start is with the official installers. A solid, step-by-step overview of Git’s moving parts is captured in the “Git Version Control: A Comprehensive Guide to Modern Practices”, but you don’t need to know everything up front to get going.
- Visit the Git downloads page (your OS will be detected automatically).
- Download the installer for your system and accept the default options; they’re safe for beginners.
- Open a terminal (or PowerShell) and verify the installation:
You should see something likegit --versiongit version 2.xx.xor newer. Git maintainers and tooling vendors are already talking about Git 3.0 as a major step, focusing on performance improvements and a more secure SHA-256 hash format in place of older SHA-1, as highlighted in Git 3.0 readiness articles.
Configure your Git identity once
Out of the box, Git doesn’t know who you are. Every snapshot you take of your “dish” needs a name and email attached so teammates (and future you) can see who changed what. Set this up a single time in your terminal:
git config --global user.name "Your Name"
git config --global user.email "you@example.com"
The --global flag tells Git to reuse this identity for all repositories on your machine. These values will show up on every commit you make and, when they match your hosting account, they’ll also power contribution graphs and activity feeds that hiring managers often look at when scanning your GitHub profile.
Connect your local Git to GitHub
Right now, Git is like cooking at home alone. To join a shared kitchen where others can review your work and where AI tools can open pull requests and run tests on your code, you need to connect to a remote host such as GitHub.
- Create a free account on GitHub if you don’t already have one.
- Set up SSH keys so you’re not constantly typing passwords:
Press Enter to accept the default file location, then choose a passphrase if you want extra protection.ssh-keygen -t ed25519 -C "you@example.com" - Copy the contents of your public key file (often
~/.ssh/id_ed25519.pub) and add it under GitHub → Settings → SSH and GPG keys.
Pro tip: use the same email for user.email and your GitHub account so your commits link cleanly to your profile. One of the most common beginner mistakes is skipping this step or using mismatched emails, which leads to “unknown” commits and broken contribution graphs. Getting this wiring right now means that when you start pushing real projects, opening pull requests, and wiring in automation, every change is clearly attributed to you instead of vanishing into anonymous history.
Master the core workflow: edit, stage, commit, push
The core Git workflow is a lot less mysterious if you treat it like the “boil water, salt it, add pasta” of your dev kitchen: simple, repeatable moves you’ll use dozens of times a week. Instead of memorizing every subcommand, you only really need to get comfortable with a tight loop - edit, stage, commit, push - that turns your messy, in-progress changes into clean snapshots you can roll back to when something burns.
Run the daily Git loop
In practice, most professional teams are just repeating a small sequence around focused, atomic commits - changes that do one thing and do it well. Guides like GitLab’s version control best practices explicitly recommend small, self-contained commits because they make reviews, debugging, and rollbacks much easier. Here’s the loop you’ll use constantly:
- Edit files in your project (for example,
index.htmlorapp.js). - Inspect what changed so nothing sneaks in:
git status git diff - Stage the right files - your “mise en place” before you save the snapshot:
git add file1.js file2.js # or, if you're sure: git add . - Commit with a clear message describing what you did:
git commit -m "Add login form validation" - Push to your remote so the change is backed up and shareable:
If it’s a brand-new repo, wire it up first:git push origin main
Thegit remote add origin git@github.com:your-username/your-repo.git git push -u origin main-uflag sets a default “upstream,” so later you can just rungit pushwithout extra arguments.
Warning: git add . is convenient, but it will stage everything in your working directory, including debug files or half-finished experiments. On real projects, many teams expect you to add files intentionally so each commit is a clean, reviewable step rather than a grab bag of unrelated changes.
Keep the essential commands at your fingertips
| Goal | Command | When you use it | Notes |
|---|---|---|---|
| Start tracking a folder | git init |
New project on your machine | Creates an empty Git repo in the current directory |
| Clone an existing project | git clone <url> |
Join a project on GitHub/GitLab | Copies full history plus files |
| See what changed | git status, git diff |
Before staging or committing | “Look up from the cutting board” and check the kitchen |
| Save a snapshot | git commit -m "Message" |
After finishing a logical task | Use specific, past-tense messages |
| Share and sync | git push, git pull |
Collaborating or backing up | Push sends changes; pull brings others’ work to you |
According to a skills survey from Dataquest on essential Git skills, being fluent with this basic set - status, add, commit, push, pull, and clone - is still the foundation most hiring managers look for, even as more advanced workflows emerge around rebasing, cherry-picking, or interactive history edits.
Why small, clear commits matter when AI is in the mix
As AI tools start suggesting larger and larger chunks of code, your job shifts from “type everything” to “curate and control the flow of changes.” Atomic commits and meaningful messages turn your history into a series of small, labeled tastes rather than one giant, burned sauce you can’t unmix. That discipline is what lets you review AI-suggested changes safely, group them into logical steps, and roll back a single bad decision instead of losing an entire afternoon’s work. A practical habit you can start today on any tiny project: every time you finish one coherent task - “implement search bar,” “handle empty results,” “style search field” - run through this edit → status/diff → add → commit → push loop, and write the commit message as if you’re leaving a note in the margin of a recipe you’ll revisit six months from now.
Branch like a pro and choose a branching strategy
Picture a busy dinner service: the main pot of sauce is sacred, but you’ve got a little test pan on the side where you add extra chili, try a splash of cream, or experiment with herbs. In Git, that test pan is a branch. The main pot is your main branch. Branching “like a pro” is mostly about never dumping experiments straight into the only pot you have.
Create a safe test pan for each change
Instead of hacking directly on main, you create a short-lived feature branch for each task, work there, then merge it back once you’re happy with the flavor. A simple, repeatable pattern looks like this:
- Start from a clean, up-to-date main:
git checkout main git pull - Create and switch to a feature branch:
git checkout -b feature/add-search - Do the work in small commits, using the edit → status/diff → add → commit loop.
- Push the branch so it’s backed up and ready for a pull request:
git push -u origin feature/add-search - After review and testing, merge it back into
mainvia a pull request.
Pro tip: name branches after what they do, not how you feel: feature/add-favorites, bugfix/fix-500-login, chore/update-deps. Descriptive names make it obvious what each “test pan” is for. Warning: avoid git push --force on any branch other people (or CI systems) are using; it rewrites history and can quietly throw away commits if misused.
Compare modern branching strategies
| Strategy | Main idea | Best for | Trade-offs |
|---|---|---|---|
| Trunk-Based Development | Tiny branches merge into main many times per day |
High-velocity teams with strong CI/CD | Requires discipline and feature flags to hide unfinished work |
| GitHub Flow | Always branch from main, open a PR, then merge back |
Web apps, startups, small to medium teams | Simpler than Git Flow, but assumes you can deploy frequently |
| Git Flow | Separate main, develop, feature, release, and hotfix branches |
Large or regulated projects with scheduled releases | More ceremony; harder for beginners to keep straight |
A comparative analysis of real-world teams in a Graphite guide on top Git branching strategies found that organizations with structured branching routinely process an average of 247 pull requests per repository per month, with a median merge time of about 16.4 hours. That volume only works because branches are small, focused, and short-lived. For most beginners, a lightweight GitHub Flow - branch off main, open a PR, merge when it’s green - is the sweet spot: simple enough to remember, but compatible with more advanced trunk-based habits later.
As AI agents start spinning up their own branches and raising pull requests, the branching strategy you choose becomes the map those agents must follow. Microsoft’s engineers note that “repository intelligence will become a competitive advantage by providing the structure and context for smarter, more reliable AI,” emphasizing that humans still design the structure that AI works within. In practice, that means you can start today by never working directly on main, always creating a feature branch for each new slice of work, and keeping those branches small and focused so both teammates and tools can reason about them without getting lost in kitchen chaos.
Use pull requests and code reviews (even when solo)
In a real kitchen, nothing goes to a customer without passing through the pass: a final taste, a quick inspection, maybe a tweak from the head chef. In Git, that moment is your pull request. Instead of quietly pushing changes straight to the main pot and hoping for the best, you plate them up in a PR where humans (and now AI tools) can look, comment, and run checks before anything leaves the kitchen.
Treat pull requests as your “taste test at the pass”
A pull request is just you saying, “Here’s what I changed, here’s why, and here’s how to verify it’s good.” On platforms like GitHub, PRs have become the default way teams collaborate and enforce quality. Modern best-practices guides emphasize that PRs are the primary gate where tests, security scans, and reviews all converge before code hits a protected branch.
- Push your feature branch:
git push -u origin feature/add-search - On your Git hosting platform, click “Compare & pull request” (or equivalent).
- Write a clear title and description:
- What changed
- Why it changed
- How to test it (steps, sample inputs, expected outputs)
- Request review from a teammate or team.
- Let CI run its checks; only merge once tests and reviews are green.
Why structured reviews beat “YOLO to main”
When teams move from “everyone pushes to main” to branch-and-PR workflows, they’re not just being formal; they’re buying safety and traceability. A comparative analysis of real organizations in a Graphite guide on Git branching strategies found that repos using structured branching and PRs handled an average of 247 pull requests per month, with a median merge time of about 16.4 hours per PR. Separate research on enterprise Git setups shows that protected branches now block roughly 99.7% of direct pushes to core branches, forcing almost all changes through reviews and automated checks instead.
| Review style | How it works | Pros | Cons |
|---|---|---|---|
| No review | Developers push straight to main |
Fast in the very short term | High risk of bugs, no audit trail, hard to collaborate |
| Ad-hoc review | Share diffs over chat or screen share | Some feedback, informal mentoring | No consistent record, no automation, easy to skip |
| Pull requests | Branch → PR → automated checks → merge | Clear history, CI integration, easier onboarding | Requires habits and a bit more up-front discipline |
Code review in the age of AI (including when you’re solo)
AI coding assistants are now drafting functions, wiring up components, and even opening pull requests on their own branches. Reports on AI-assisted development, like the analysis of GitHub’s Octoverse trends discussed in Visual Studio Magazine’s coverage of AI reshaping language choices, stress that this shift doesn’t remove humans from the loop; it changes our role. You’re increasingly the person who designs the branching rules, reviews AI-authored diffs, and decides whether a suggested change really belongs in production. Even if you’re working alone, opening a PR to yourself is worth it: you get a clean diff, test runs on every change, and a public trail of professional-style reviews that future teammates (and hiring managers) can browse. A simple habit you can adopt immediately is this: for your next small feature, always work on a branch, open a PR with a clear description, and read through the diff line by line before you hit merge, treating it like a final taste before the plate leaves your kitchen.
Resolve merge conflicts without panic
The first time Git throws a merge conflict at you, it feels like the oven caught fire: red text in the terminal, half-finished changes, and no clear sense of what’s safe to touch. Underneath the drama, though, a conflict is just Git raising its hand and saying, “Two different edits landed on the same lines; I need a human to choose.” Once you see it that way, resolving conflicts becomes a mechanical cleanup job, not a crisis.
Understand when conflicts happen
Conflicts show up any time parallel work collides on the same hunk of code. As teams adopt more aggressive branching and automation, version control is handling more simultaneous change than ever; analyses of modern DevOps trends, like the review of version control’s future from Okoone’s research on DevOps and version control, point out that highly parallel workflows are now the norm rather than the exception. That means conflicts aren’t a sign you “broke Git” - they’re a sign your collaboration is real.
- You and a teammate both edit the same function on different branches, then try to merge.
- You rebase your feature branch onto an updated
mainthat changed the same lines. - An AI tool refactors a file while you’re making manual tweaks nearby.
Resolve a simple conflict step by step
When Git stops a merge or rebase with a conflict, don’t start randomly running commands. Follow a fixed sequence, and you’ll always end up in a clean state:
- See what’s conflicted:
Look for files marked “both modified” or “unmerged paths.”git status - Open each conflicted file in your editor. You’ll see markers like:
The block between<<<<<<< HEAD const items = getRecipes(); ======= const items = getRecipes().filter(r => r.isPublished); >>>>>>> feature/add-search<<<<<<< HEADand=======is your current branch; the block below is the incoming change. - Decide what the final code should be. For example, you might keep the filtered version:
Delete all the conflict markers (const items = getRecipes().filter(r => r.isPublished);<<<<<<<,=======,>>>>>>>) so only valid code remains. - Mark the file as resolved:
git add path/to/file.js - Finish the operation:
- If you were merging:
Git will prefill a merge commit message you can edit.git commit - If you were rebasing:
git rebase --continue
- If you were merging:
| Operation | When conflicts appear | Continue after fixing | Abort if needed |
|---|---|---|---|
| Merge | Combining branches (e.g., main ← feature) |
git commit |
git merge --abort |
| Rebase | Replaying commits onto a new base | git rebase --continue |
git rebase --abort |
Back out safely if you get lost
If you realize halfway through that you’ve made a mess - maybe you accepted the wrong side of a conflict, or your tests are suddenly failing everywhere - you don’t have to dig the whole thing out by hand. While a merge conflict is in progress, you can always reset to the pre-conflict state:
# If you were merging:
git merge --abort

# If you were rebasing:
git rebase --abort
Those commands tell Git, “Pretend this merge or rebase never started,” and put you back where you were before you ran it. Tutorials like the “Git Gud: Version Control Best Practices” article on R-bloggers’ overview of Git best practices frame this kind of escape hatch as part of normal Git hygiene: you experiment, you hit conflicts, you fix them or abort, and then you try again with more information. The practical move you can make right now is to create a tiny repo with two branches that deliberately change the same line, then walk through this exact sequence; once you’ve untangled one conflict on purpose, the next unexpected one will feel much more like routine kitchen cleanup than a disaster.
Automate tests with GitHub Actions and learn GitOps
Once your Git “kitchen” is up and running, the next step is adding timers: something that automatically checks each dish before it leaves the pass. That’s what continuous integration and GitOps do: they wire your commits and branches into a network of tests, security scans, and deployments so you’re not relying on “I think it’s fine” right before you push to main.
Wire in a basic CI timer with GitHub Actions
GitHub Actions has quietly become the default way many teams automate builds and tests. Public repositories alone consumed about 11.5 billion minutes of Actions time in a single year, with usage jumping roughly 35% year over year. That’s a lot of automated taste-testing. You don’t need a massive pipeline to start; a small workflow file can run your tests on every push and pull request to main:
- In your project, create the directory:
mkdir -p .github/workflows - Create
.github/workflows/ci.ymlwith a minimal Node.js workflow:name: CI on: push: branches: [ main ] pull_request: branches: [ main ] jobs: build-and-test: runs-on: ubuntu-latest steps: - uses: actions/checkout@v4 - uses: actions/setup-node@v4 with: node-version: '20' - run: npm install - run: npm test - Commit and push the workflow:
git add .github/workflows/ci.yml git commit -m "Add basic CI workflow" git push - Open the “Actions” tab in your Git hosting UI to watch the workflow run on each push and pull request.
Use CI to protect your main branch, not just to “see if tests pass”
On professional teams, Actions (or similar systems) are wired directly into branch protection rules so bad changes simply can’t be merged. Engineering leaders increasingly treat version control as the backbone of their automation; one AI/DevOps guide from Exceeds AI on measuring AI ROI in version control highlights how pipeline data around each commit is used to track whether changes (human or AI) are stable, frequently reverted, or introducing regressions. You can borrow a lighter-weight version of that discipline by requiring your CI checks to pass before merging any pull request into main.
| Style | What happens on commit | Pros | Risks |
|---|---|---|---|
| Manual only | Developer runs tests locally (if they remember) | Simple, no setup | Easy to skip tests, hard to enforce standards |
| Basic CI | Every push/PR triggers automated tests | Consistent checks, early bug detection | Requires maintaining the pipeline |
| CI + protected main | PRs can’t merge unless checks pass | Strong guardrails around production | Slower merges if tests are flaky |
Learn the GitOps pattern: Git as the source of truth
GitOps takes that same idea and extends it to your infrastructure: instead of manually tweaking servers or clicking around cloud dashboards, you declare the desired state of your environment in Git, and a controller keeps reality in sync with what’s in the repo. Analyses of cloud-native teams in a DevOps.com exploration of why GitOps might be the future of DevOps note that Git has effectively become the “single source of truth” for Kubernetes clusters, with GitOps-style workflows now driving well over 90% of deployments. In a typical setup, you push a change to a YAML file in main, a GitOps tool like Argo CD or Flux notices, and the cluster is updated to match:
“GitOps uses Git as the single source of truth for both application and infrastructure code, enabling teams to manage complex systems with the same rigor as application development.” - DevOps.com, GitOps trends and predictions analysis
For you as a beginner or career-switcher, you don’t need to master Argo CD on day one. The immediate, practical move is to hook up a basic CI workflow to your main branch and get used to the rhythm of “push → automated tests → green check → merge.” Once that feels normal on a small project, the idea that a merge could not only run tests but also reconfigure servers starts to feel like a natural extension of the same pattern: Git as the place where you declare intent, and automation as the kitchen staff that quietly makes it happen.
Write a human- and AI-friendly commit history
Scroll through the history of a healthy project and it feels like flipping through a smudged cookbook: short notes in the margins, dates, little “fixed this” arrows. Scroll through a messy one and it’s more like finding a stack of crumpled receipts - “update,” “stuff,” “wip” - with no idea what any of it means. The difference isn’t magic Git tricks; it’s the habit of writing a commit history that another human (and now AI tools) can actually read.
Write commit messages that tell a tiny story
A good commit message answers three things in one line: what changed, why it changed, and roughly how it was done. That doesn’t mean an essay; it means something that your teammate - or future you - can skim six months from now and immediately know whether this is the “fix signup bug” commit or the “refactor layout grid” one.
| Scenario | Unhelpful message | Better message | Why it’s better |
|---|---|---|---|
| Adding client-side validation | update |
Add client-side validation to signup form |
Captures the feature and where it applies |
| Fixing a crash | fix stuff |
Prevent null pointer when user profile is missing avatar |
Makes the bug and its cause explicit |
| Refactoring UI | changes |
Refactor header into reusable LayoutHeader component |
Signals a structural change, not new behavior |
Guides on Git hygiene, like the productivity-focused overview in “5 Essential Git Tools Every Developer Needs in 2026” on Medium, repeatedly call out clear commit messages as the foundation that makes every other tool useful - diff viewers, blame, history browsers - because those tools can only surface what you’ve actually written down.
Keep commits atomic so history stays debuggable
On real teams, the people who look “fluent” in Git aren’t usually the ones with the fanciest aliases; they’re the ones who practice atomic commits: each commit does one focused thing. That might be “implement search bar behavior,” or “add tests for unauthenticated users,” but it’s rarely “implement search + restyle header + upgrade three libraries.” Small, self-contained commits make it possible to:
- Use tools like
git bisectto pinpoint exactly which change introduced a bug. - Review a pull request file-by-file and commit-by-commit without getting overwhelmed.
- Revert a bad decision (one commit) without losing a whole day of work.
Career roadmaps for full stack developers, such as the skills breakdown on Edstellar’s list of must-have full stack skills, put Git and version control right alongside languages and frameworks because these small, reversible steps are how you keep a React, Node.js, or mobile codebase from turning into a single, unfixable blob.
Use tags and branches to mark important milestones
Beyond individual commits, you can mark big moments - releases, demos, production hotfixes - with tags and carefully named branches. Tags like v1.0.0, v1.1.0, and v1.1.1 follow the same spirit as semantic versioning in software releases: bump major for breaking changes, minor for new features, patch for small fixes. The broader conventions around this are summarized in references like the Software versioning overview on Wikipedia. In practice, that means when someone asks, “What shipped in v1.1.0?”, you can jump straight to that tag and read a clean history from there, instead of hunting through random dates and “misc fixes” messages.
Remember that AI is reading your commit history too
Now that AI coding tools are drafting more of the code itself, your Git history has a second audience: machines trying to learn from your patterns. Analyses of AI-assisted development, like MIT Technology Review’s look at how AI coding is now everywhere, point out that not everyone is convinced by the hype - but they agree that AI is already generating serious volumes of production-bound code. Those systems work best when they can see clean, well-labeled examples: commits that correspond to single ideas, messages that explain intent, and tags that mark known-good states. The simple habit you can start today is this: for your next tiny feature, break it into two or three atomic commits, write messages that a stranger could understand, and, when you ship, add a tag that marks the release. Over time, you’ll build a history that feels less like a pile of mystery leftovers and more like a living cookbook - one that humans and tools can both actually use.
Practice realistic workflows and build portfolio projects
At some point you have to move past “hello world” Git demos and into the messy stuff: a feature that touches multiple files, a bug that only appears in production, a teammate’s change landing right in the middle of yours. That’s the difference between casually chopping vegetables at home and working a small corner of a real line. The only way to get comfortable is to rehearse realistic workflows on purpose and then capture them in projects you can actually show to other humans.
Rehearse real-world Git flows on tiny projects
Instead of just practicing isolated commands, give yourself three small, repeatable drills that mirror what real teams do every day. First, a feature workflow: branch off main, make two or three atomic commits that build up a feature (for example, “add search bar,” “hook search to API,” “style search results”), open a pull request to yourself, and merge only after you’ve read the diff. Second, a hotfix workflow: pretend production is broken, branch directly from main, write a focused fix and a test, open a PR, and merge it quickly. Third, a sync workflow: while you’re on a feature branch, make a change on main, then practice pulling or merging those new changes into your branch and resolving anything that collides.
Even if you’re solo, treat these drills like team practice. Use issues to describe each task, reference them in your commit messages, and write PR descriptions that explain what changed and how to test it. Over time you’ll build muscle memory around the whole flow, not just “type git commit and hope.” As one engineer put it in a widely shared article on LinkedIn, “Git has become a non-negotiable skill for developers, regardless of language or framework.” - Ashutosh Kumar, Software Engineer, in his piece “Why Git is a Must-Have Skill for Developers.” Those non-negotiable skills aren’t fancy commands; they’re these everyday habits.
Use structured bootcamps to stack Git reps into full stack projects
If you’d rather not design all your practice scenarios from scratch, a structured program can bake Git workflows into every assignment. Nucamp’s Full Stack Web and Mobile Development Bootcamp runs for 22 weeks at about 10-20 hours per week, costs roughly $2,604 with early-bird pricing, and walks you through a complete JavaScript stack: HTML/CSS/JavaScript, React, React Native, Node.js, Express, and MongoDB. Students spend the final 4 weeks building and deploying a full stack portfolio project, with Git and GitHub used for version control, collaboration, and code review the entire way. The program is fully online with weekly live workshops capped at around 15 students, and it consistently earns about 4.5/5 stars on review platforms, making it a realistic option for career changers who want lots of reps in a guided environment rather than trying to stitch everything together alone. You can see the full curriculum and structure on Nucamp’s Full Stack Web and Mobile Development overview.
| Path | Typical duration | What you practice | Portfolio outcome |
|---|---|---|---|
| Self-guided small projects | Flexible (nights/weekends) | Feature branches, hotfixes, PRs to yourself, basic CI | 1-2 small apps with visible Git history and solo reviews |
| Nucamp Full Stack Bootcamp | 22 weeks, 10-20 hrs/week | Full stack JavaScript, team-style Git workflow, code reviews | Deployed full stack app plus repos showing professional habits |
| Solo AI Tech Entrepreneur Bootcamp | 25 weeks | SaaS architecture, AI integration, GitHub Actions, Docker | Live AI-powered product with end-to-end Git and CI/CD history |
The practical move you can make this week is simple: pick one small app idea (a notes tool, a recipe tracker, a tiny React dashboard), and run at least one full feature workflow and one hotfix workflow on it using branches and pull requests, even if you’re the only contributor. Once you’re comfortable with that on your own, consider leveling up through a structured path like a 22-week full stack bootcamp or, later, an AI-focused program where every new React component, Node.js route, or deployment change becomes another rep in the same core Git patterns you’ve already been practicing.
Build a 2026-ready learning path: bootcamps and next steps
By this point, you’ve seen Git as more than a few commands: it’s the safety system that keeps your main dish edible while you experiment in test pans on the side. The next question is, “How do I go from ‘I can follow a tutorial’ to ‘I can survive on a real team in an AI-heavy world’?” That’s where a deliberate learning path comes in: start with solo reps, then layer on structured full stack training, and finally add AI and DevOps so you can wire Git into automation instead of just using it as a fancy save button.
Step 1: Lock in the fundamentals on your own time
The first leg of the journey is cheap and flexible: use small personal projects to practice the habits you’ve just learned. Pick one or two simple apps (a task tracker, a recipe search, a note-taking SPA) and commit to always using branches, pull requests (even to yourself), and clear commit messages. Resources like skills checklists from data-focused platforms and modern Git primers consistently put these basics - clone, branch, commit, merge, resolve conflicts - at the top of “still essential” lists, even as AI tools get more capable. The goal of this phase isn’t to build something huge; it’s to make Git feel as routine as saving a file, so when things break, you instinctively reach for the right commands instead of panicking.
Step 2: Use a full stack bootcamp to turn reps into a portfolio
Once you’re not afraid of Git, you’ll get more out of a structured program that forces you to apply it across a real stack. Nucamp’s Full Stack Web and Mobile Development Bootcamp is one example built with career-switchers in mind: it runs for 22 weeks, asks for about 10-20 hours per week, and costs roughly $2,604 with early-bird pricing and payment plans. You work through HTML, CSS, and JavaScript, then React on the front end, React Native for mobile, and Node.js, Express, and MongoDB on the back end, all in a 100% online format with weekly 4-hour live workshops capped at around 15 students. The final 4 weeks are dedicated to a full stack portfolio project where Git and GitHub aren’t an afterthought - they’re the backbone of how you collaborate, review code, and deploy. You can see how the curriculum and schedule are laid out on the Nucamp Full Stack Web and Mobile Development overview.
“It offered affordability, a structured learning path, and a supportive community of fellow learners.” - Nucamp Full Stack bootcamp graduate, reflecting on why they chose the program
For many students, that structure - plus the price point, which sits far below the $15,000+ sticker shock of some competitors - is what turns scattered tutorials into a coherent portfolio. Over thousands of reviews, Nucamp’s programs average about 4.5 out of 5 stars on major review sites, with roughly 80% five-star ratings, and a lot of the praise centers on the mix of flexibility, small cohorts, and practical projects. Crucially, every React component, Express route, and MongoDB schema you build is committed, pushed, and reviewed in a Git-centric workflow, so by the time you graduate you’re not just “familiar with Git” - you have months of evidence in your repos that you can use it like a working developer.
| Stage | Duration | Main focus | Git outcome |
|---|---|---|---|
| Self-study foundations | 4-8 weeks (flexible) | Tutorials, tiny apps, basic Git commands and branches | Comfortable with init/clone, branch, commit, merge, simple conflicts |
| Nucamp Full Stack Bootcamp | 22 weeks | React, React Native, Node.js, MongoDB, team-style workflows | Portfolio app plus visible history of professional Git usage |
| Advanced AI / DevOps training | ≈25 weeks | CI/CD, GitHub Actions, AI integration, cloud deployment | Comfort driving automation and AI workflows from Git |
Step 3: Add AI and DevOps so Git drives automation, not just saves code
After you’ve shipped a full stack app or two, the next layer is learning how Git connects to pipelines, infrastructure, and AI systems. Nucamp’s Solo AI Tech Entrepreneur Bootcamp is one example of that “phase two”: over 25 weeks you learn to design and ship an AI-powered SaaS product with Svelte for the front end, Strapi and PostgreSQL on the back, plus Docker and GitHub Actions for packaging and CI/CD. Tuition sits around $3,980 with early-bird options, and the capstone is a live product complete with authentication, payments, and global deployment. Here, Git isn’t just where the code lives - it’s how deployments are triggered, how AI integrations are versioned, and how you prove to yourself (and future investors or employers) that you can run the whole kitchen, not just chop one ingredient. The practical way to start down this path today is to be honest about where you are - getting Git basics down, needing structured full stack practice, or ready for AI/DevOps - and then choose the next step that will force you to use Git in the way working teams actually do, instead of only in carefully edited tutorial scenarios.
Verify your skills: self-checklist and next moves
Skill check time. You’ve walked through installing Git, branching, opening pull requests, wiring up basic CI - the foundations of a modern dev “kitchen.” Now you want to know: is this good enough for a junior role or serious career switch, especially with AI tools churning out code all around you? A simple, honest checklist can tell you where you’re solid, where you’re shaky, and what to practice next before you put “Git” and “full stack” on your résumé.
Run a quick self-audit on your Git skills
Grab a notebook or a doc and rate yourself “yes, confidently,” “yes, but with notes open,” or “not yet” on each item. Be ruthless; nobody else is looking at this. The goal is to map your gaps so you stop feeling “bad at Git” in a vague way and can target specific skills instead.
| Skill | What you should be able to do | Self-check |
|---|---|---|
| Install & configure | Install Git, set user.name/user.email, connect to a remote host (e.g., GitHub) via SSH or HTTPS |
Can you do this on a new machine without a step-by-step guide? |
| Core workflow | Use git status, git diff, git add, git commit, git push, git pull fluently |
Can you run the edit → stage → commit → push loop without Googling commands? |
| Branching | Create feature branches, keep them short-lived, and merge them back into main via pull requests |
Do you avoid working directly on main for new features? |
| Pull requests & review | Open PRs with clear descriptions, review diffs, and respond to feedback | Can you explain what changed and how to test it in every PR? |
| Merge conflicts | Interpret conflict markers and resolve simple conflicts cleanly, or abort merges/rebases safely | Do conflicts feel like routine cleanup rather than a crisis? |
| History & commits | Write meaningful commit messages, keep commits atomic, and read history with git log |
Does your history read like a series of clear, small steps rather than “misc changes”? |
| Automation awareness | Set up a basic CI workflow (e.g., run tests on each push/PR) and understand how it protects main |
Do you expect a green check from CI before merging, even on personal projects? |
| GitOps concept | Explain in plain language how Git can act as the source of truth for infrastructure (e.g., Kubernetes) | Could you describe GitOps at a high level in an interview? |
Interpret where you are today
If you answered “confident yes” on most of the early rows but hesitated on merge conflicts, automation, or GitOps, you’re in the same boat as a lot of early-career devs and bootcamp grads. That’s normal. The important part is that you can already treat Git as a safety net for your own work: you can install it, commit in small steps, branch instead of hacking on main, and recover from simple mistakes. From there, you can deliberately practice the scarier bits - rebases, conflicts, CI/CD - on low-stakes side projects until they feel boring.
Plan your next moves in an AI-heavy world
AI coding tools aren’t going away; if anything, they’re getting more deeply embedded into editors, issue trackers, and CI systems. As Microsoft’s look at what’s next in AI points out, AI is increasingly woven into every layer of the stack, which means humans are shifting into roles where judgment, workflow design, and accountability matter more than typing speed. Practically, that suggests three concrete next steps: first, tighten any weak spots from your checklist with focused practice (for example, resolve three deliberately created merge conflicts in a toy repo); second, build or refine a portfolio project where your Git history, branches, and pull requests clearly show professional habits; third, consider structured learning - like a full stack or AI-focused bootcamp - once you’ve squeezed as much as you can out of solo practice. If you treat this checklist as a living document and revisit it every few months, you’ll see your “not yet” answers turn into “of course,” and you’ll be able to talk about Git in interviews not as a buzzword, but as a set of concrete skills you use to keep the kitchen running smoothly.
Common Questions
Do I really need to learn Git to start a developer career in 2026?
Yes - Git is essentially the industry standard (about 93.87% of version control usage) and is listed as a baseline skill for full-stack and DevOps roles; employers expect you to know it before joining a team. Learning Git early saves time and prevents common onboarding surprises.
How should I think about Git so it stops feeling intimidating?
Treat Git like a kitchen: keep your main branch as the main pot, use short-lived feature branches as test pans, and make commits as deliberate “tastes.” That mental model makes branching, merging, and rollbacks feel like routine kitchen moves rather than magic commands.
Which Git workflows and commands should I prioritize learning first?
Start with the core loop: edit → git status/git diff → git add → git commit → git push, plus git clone/git checkout for joining projects and creating branches, and basic conflict resolution. These commands form the set hiring managers still expect you to be fluent with.
With AI writing more code, do I still need to understand Git deeply?
Yes - AI is now opening and suggesting PRs (over a million PRs in recent months) and CI systems run at massive scale (GitHub Actions used ~11.5 billion CI minutes a year), but humans still design workflows, review changes, and own rollbacks. In short, AI changes how you work but increases the value of solid Git judgment.
If I only have a few weeks, what’s the fastest practical plan to get Git-ready for applications?
Focus 4-8 weeks on small, repeatable drills: build a tiny app, always create feature branches, open PRs (even to yourself), resolve a few deliberate merge conflicts, and add a basic CI workflow. That routine produces portfolio repos with clear, atomic commits you can point to in interviews.
For a realistic job-search plan, check the best companies hiring full stack developers in 2026 to see what employers actually value.
If you’re just starting, follow this how to become a full stack developer in 2026 checklist for a realistic 90-day path.
To understand async patterns like use(), read the learn modern React data patterns section.
Our mobile dev guide contrasts React Native vs Flutter for 2026 career choices.
If security is your concern, the handling environment variables and Docker Secrets securely portion is essential.

Irene Holden
Operations Manager
Former Microsoft Education and Learning Futures Group team member, Irene now oversees instructors at Nucamp while writing about everything tech - from careers to coding bootcamps.